 1. In workflowname.cs(Workflow1 in example above):
a. Add method (Set on task invoke property)
private void createTask1_MethodInvoking(object sender, EventArgs e)
{
…
this.createTask1_TaskProperties1.TaskType = 0;
…
}
2. Create a module to save the published InfoPath form inside the workflow Element, in our case it is
  5. Have a look at the main feature manifest file.
a. Add under properties node(if missing):
 6. You are required to change the security setting of the InfoPath form. Follow the steps below.
a. Click File
b. Click Form Options
c. Select Security and Trust
i. Deselect Automatically determine security level(recommended)
ii. Select Domain
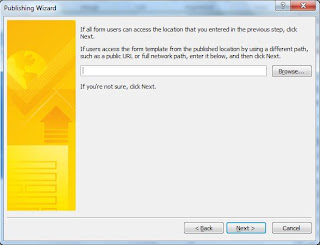
7. Time to publish the form
a. Click File
b. Select Publish
c. Select Network Location
d. Click browse and enter location on your machine where you want to publish the form and mention a name in the form template name field below and click Next.
e. Remember to clear the field and click Next
 f. Click Publish and the form is published and ready for use.
Good article!!! but you don't explain clearly, we can't execute exactly. please provide more with step by step. Thanks
ReplyDelete